

Best Camera Backpacks: Practical Buying Guide
Affiliate disclosure: This article contains affiliate links (paid links). If you buy through them, Proton-Pack may earn a commission at no extra cost to you. As an Amazon Associate I earn from qualifying purchases. Learn about our editorial policy.
What is the best camera backpack for your photography equipment? It is the bag that holds your actual camera, largest mounted lens, accessories and personal essentials securely, remains comfortable with the full load, and provides the access you need. A compact 11 L camera backpack can be ideal for a small day kit, while a larger modular or hybrid pack may suit professional assignments, travel, hiking or a camera-and-laptop setup.
This is Proton-Pack’s main camera-backpack buying guide, linking to our detailed product reviews and specialist comparisons. If your kit is relatively small, compare the access and comfort trade-offs in our camera sling bag versus backpack guide. If you already like your everyday bag, our camera cubes and backpack inserts guide compares removable padding and modular sizing. It includes currently documented models such as the Lowepro Flipside 200 AW II, Lowepro ProTactic BP 350 AW III and Thule Covert 24 L, and it clearly identifies older Amazon Basics, Altura, Acuvar, G-raphy and Vivitar designs as legacy options. It does not claim new hands-on testing or pretend every old retailer link leads to a current product.
Quick comparison: which camera backpack design makes sense?
| Bag or design | Better suited to | Trade-off |
|---|---|---|
| Lowepro Flipside 200 AW II — 11 L | Compact DSLR or mirrorless day kit; body-side access and weather cover | Small laptop allowance: 7-inch tablet rather than a full-size computer |
| Lowepro ProTactic BP 350 AW III — 17 L | More demanding camera organization with four access points and modular dividers | 2.3 kg empty weight and a relatively compact laptop sleeve |
| Thule Covert DSLR 24 L | Hybrid everyday/travel carrying with removable camera pod and laptop storage | 1.9 kg empty, larger external dimensions, variable stock |
| Lowepro ProTactic BP 450 AW III — 28 L | Bigger professional camera-and-accessory arrangements | Larger and heavier; unnecessary for a small one-camera kit |
| USA GEAR S17 | Budget-oriented camera storage, laptop space and side access | Check the exact model variant, divider fit and published dimensions |
| Older Amazon Basics, Acuvar, G-raphy, Vivitar and Altura | Used or legacy budget comparisons where condition and price are attractive | Availability, interior measurements and model identification can be uncertain |
The capacity figures above are manufacturer-published values for the specifically named current models, not independently measured internal usable space. Different makers do not necessarily measure volume in identical ways. Your camera-with-lens dimensions and padded compartment layout should remain the deciding factors.
Verified camera backpack sizes, capacity and empty weights
The numbers below come from the specific models’ published manufacturer specifications. All weights are empty-bag weights, not estimates of a fully loaded camera kit. Figures refer to the current named generations, so do not apply them to an original ProTactic 350 AW, 450 AW, or a different Thule Covert model.
| Model and manufacturer source | Volume | Empty weight | External dimensions |
|---|---|---|---|
| Lowepro Flipside 200 AW II | 11 L | 0.95 kg | 24.5 × 20 × 43.5 cm |
| Lowepro ProTactic BP 350 AW III | 17 L | 2.3 kg | 19 × 31.5 × 47 cm |
| Thule Covert DSLR 24 L | 24 L | 1.9 kg | 33 × 23 × 48 cm |
| Lowepro ProTactic BP 450 AW III | 28 L | 2.95 kg | 23 × 34.5 × 51 cm |
The 11 L Flipside is the lightest of these examples and prioritizes a camera-first kit. The 17 L ProTactic 350 AW III weighs more despite having less stated volume than the 24 L Covert, reflecting different internal structure and modular carrying features. For a professional multi-camera system, the 28 L ProTactic 450 AW III adds more capacity but also starts at nearly 3 kg empty. Manufacturer volume figures are not standardized measurements of usable padded camera space; dimensions and real gear fit remain essential.
These exterior measurements also help assess travel use. See our camera backpack air-travel size comparison for a preliminary check against Air Canada standard carry-on and personal-item limits.
Step 1: measure the camera gear before choosing a bag
Start with your most commonly used camera and its largest attached lens. Measure the assembled length and width, including any lens hood, tripod collar or battery grip. This gives you a real starting point for internal compartment selection. A backpack advertised for “six lenses” may suit several small primes but not one large telephoto zoom and five more lenses.
Then list the items that normally accompany the camera: additional lenses, flash, charger, memory cards, battery pouch, filters, tripod and possibly a drone or microphone. Keep bottles and other items that could leak in separate compartments. The ideal bag should leave sufficient space for padded dividers without forcing its exterior panels shut.
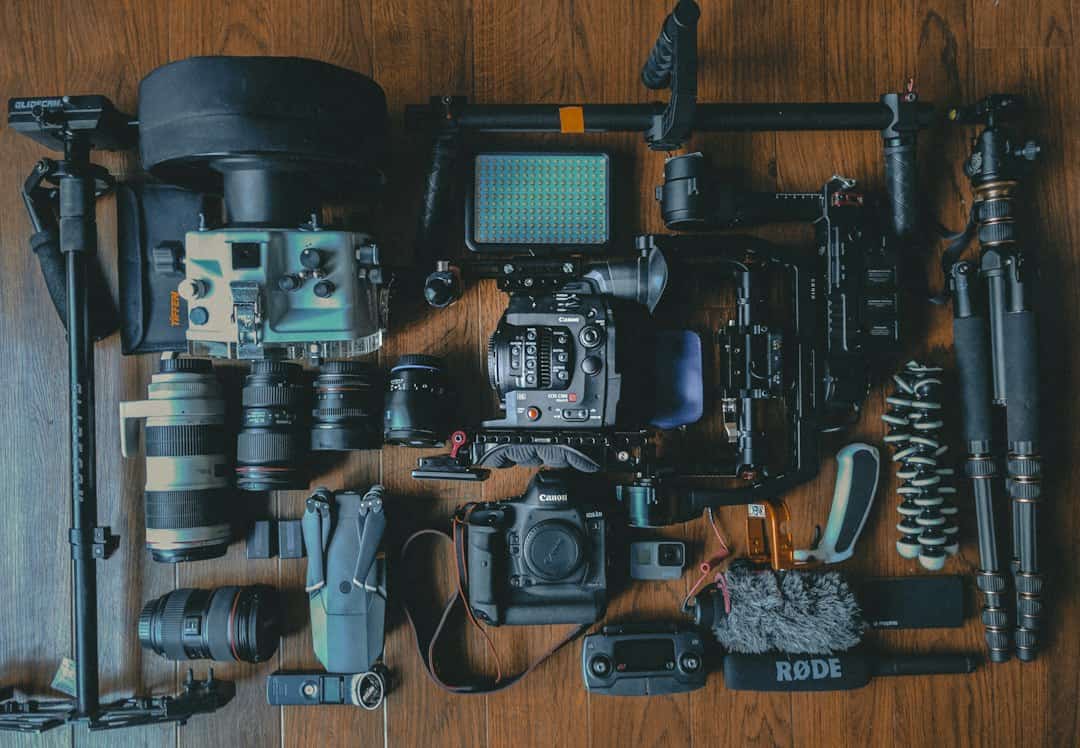
Illustrative camera-gear photograph by Jakob Owens via Unsplash. The pictured gear was not independently tested for this guide.
Compact choice: Lowepro Flipside 200 AW II
The Lowepro Flipside 200 AW II is a compact, camera-focused pack with 11 L total volume, 0.95 kg empty weight and 20.5 × 12.6 × 38 cm internal dimensions. Lowepro’s product example includes a mirrorless or DSLR with a 70–200 mm lens attached plus another one or two lenses, a compact tripod and a 7-inch tablet. Your actual lens and camera dimensions still need checking.
The practical feature is body-side access: the main camera compartment faces the wearer’s back when the bag is worn, making the zipper less exposed to people behind the photographer. A rain cover and compact tripod attachment are useful extras. The limitation is carrying space: this is not a general-purpose laptop backpack or a large clothing-and-equipment travel pack.
Our complete Flipside 200 AW II guide includes a dimension table, real gear-fit checklist, advantages, drawbacks and important distinctions from the larger Flipside models.
Modular professional option: Lowepro ProTactic BP 350 AW III
For a more substantial camera kit, Lowepro’s current ProTactic BP 350 AW III offers 17 L total volume, a 2.3 kg empty weight and 14.5 × 27.5 × 44 cm camera-compartment dimensions. It features four access points, updated ActivZone support, molded MaxFit dividers, bottle pockets and a modular accessory arrangement.
The main attraction is flexible organization: a camera can be positioned near an access opening, while the full compartment can be rearranged around the rest of the equipment. The drawback is empty weight and a laptop sleeve that needs checking for the precise computer. The 350 AW III is not simply a renamed original 350 AW.
Proton-Pack also maintains separate researched guides to the original ProTactic 350 AW, original 450 AW and our original 350 versus 450 comparison. Those older models have different specifications and must not be confused with today’s III generation.
A bigger professional kit: ProTactic BP 450 AW III
If your regular equipment includes two camera bodies, several larger lenses and professional accessories, the ProTactic BP 450 AW III may be relevant. Lowepro lists 28 L total volume, approximately 2.95 kg empty weight and a revised modular organization system. Its larger form is more useful for an extensive kit than a compact one-camera outing.
The cost of the larger capacity is bulk and weight, even before adding camera equipment. Unless you routinely need that extra room, a smaller bag can be easier to use on trains, on a short city walk or during everyday photography. Always compare the fully packed load and actual physical fit rather than buying solely because a model number is larger.
Hybrid camera and everyday carry: Thule Covert DSLR 24 L
The Thule Covert DSLR 24 L provides a different approach. Its camera pod can be removed and used separately, while the main backpack handles photography and everyday equipment. Thule lists a 24 L volume, 1.9 kg empty weight and 33 × 23 × 48 cm exterior dimensions. It has side and rear access to the gear, a luggage pass-through and a laptop compartment marketed for up to a 16-inch MacBook Pro or 14-inch PC.
This is a useful option to investigate when a bag must carry both cameras and personal belongings. The removable camera pod adds flexibility, though it also occupies internal space and may not hold every bulky camera setup. The exterior measurements can exceed some airlines’ under-seat personal-item allowances, and Thule’s live stock varies by colour and region.
For a more travel-specific comparison, see camera backpacks and bags for air travel, where current airline allowances are discussed separately from bag specifications.
Outdoor backpack photograph by Abigail Ducote via Unsplash. The image illustrates carrying conditions; the pack pictured is not identified as a reviewed camera backpack.
Budget option to investigate: USA GEAR S17
The USA GEAR S17 is a budget-oriented camera-backpack design worth comparing when padded dividers, a laptop compartment and side camera access are priorities. Manufacturer and retailer listings describe a space for a camera-and-lens kit and market a laptop pocket for computers up to 15.6 inches, though the device’s actual dimensions and the precise S17 variant matter.
Its strengths are practical separation and relatively straightforward access. The risks are model-name confusion, uncertain fit for bulky equipment and the difference between weather resistance and actual water-sealed protection. Our full S17 review explains why “fits DSLR” is not a meaningful substitute for measurements.
Older budget bags: don’t mistake legacy stock for current recommendations
The earlier Proton-Pack buying guide promoted several products that were popular in their time. The original Amazon Basics DSLR backpack, Acuvar Professional, G-raphy camera backpack, Vivitar camera bag and Altura Photo DSLR backpack are still useful for understanding entry-level padded bag designs. But availability, product identity and manufacturer documentation vary significantly.
These products should not be ranked above a well-documented current backpack simply on the basis of a decade-old retailer photo, unsupported praise or a generic low price. A current bag with clear measurements and manufacturer support may offer better value than uncertain old stock.
Quick access versus a protected rear panel
A side-access backpack lets a photographer retrieve one camera without fully unpacking a larger padded compartment, provided the dividers place the camera near the opening. Top access can help when the assembled camera is intended to be removed quickly. Rear-opening bags expose the full camera compartment for packing and can position the access zipper against the wearer’s back.
None is inherently superior for every assignment. If you shoot with one camera in hand all day, rear access may be sufficient. If you frequently put the camera away and retrieve it while moving, side access may justify the extra design complexity. Always check that a mounted lens can clear the actual opening.
Padding, adjustable dividers and camera protection
Padding is essential for separating fragile equipment, but its configuration matters. A camera body should not shift freely into a charger or metal tripod plate; equally, dividers should not press hard against lens controls or displays. Look for a padded base, secure internal partitions and an access opening that remains easy to use once the bag is full.
Small-item pouches keep batteries and cards from getting lost. Separate wet or potentially leaking items from cameras and lenses. Our